
Drywall may be resilient, but it is not indestructible. It is prone to dents, cracks, and holes that require repairs and paint if not handled carefully. Drywall patching and painting is one of the most common home improvement projects any Diablo, CA homeowner can consider doing. But when the job becomes too challenging and frustrating, it calls for professional help. Custom Painting, Inc. has a team of painters skilled in drywall patching, which includes replacing it and painting any damaged drywall.
The project – repairing and painting damaged drywall
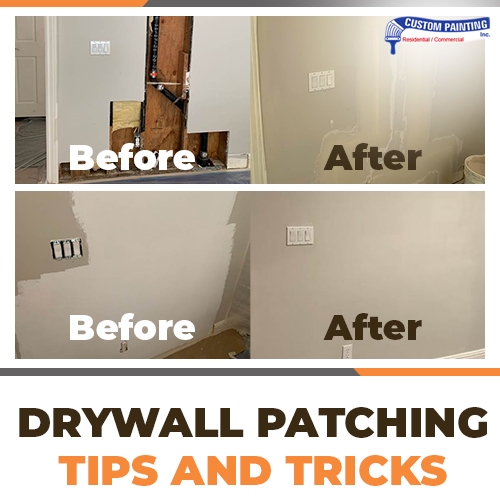
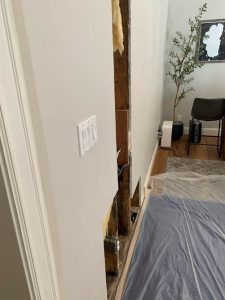
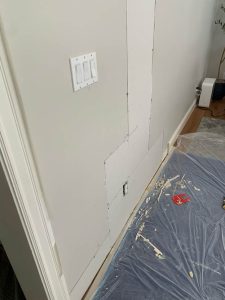
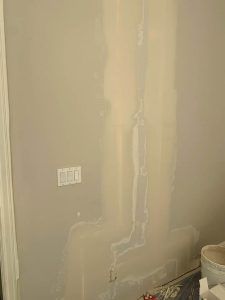
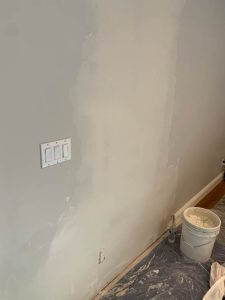
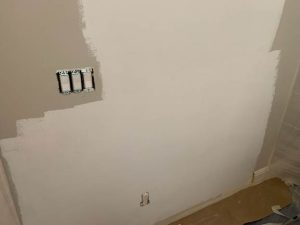
In one of our recent projects, we worked on a Livermore, CA house with missing sheetrock, so we fixed the opening and painted the room. Here are some of the challenges painters usually encounter when fixing and painting drywall:
- Bad patches – These eyesores often top the list of challenges for painters. Some patches consist of cracks or nail holes filled with spackle or compound but not feathered or sanded or such flaws filled with a tinted compound that’s noticeably different from the surrounding wall.
- Drywall dust – Sanding bare drywall results in talcum-like dust, while sanding drywall with the spackle or compound produces sawdust-like dust that typically falls to the floor instead of drifting into the air. Whichever dust is, it’s a headache for both painters and carpenters.
- Damage to surrounding surfaces – Damage includes floor damage, light switches covered with paint, furniture stains, drywall spots, and many others. They can also be a challenge to painters when patching drywall.

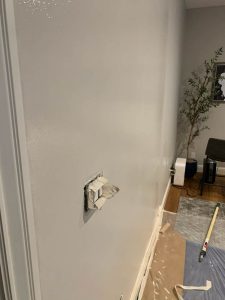
- Drywall holes – Drywall holes come in various shapes and sizes. These eyesores can be caused by bumps (such as door or furniture banging on the wall) and slashes. In households with pets and younger children, the drywall takes a beating on a regular basis.
- Drywall replacement – The drywall may be strong but won’t stand up to anything. There are situations where replacing drywall is necessary due to the following reasons:

- Discoloration
- Mold and mildew
- Bigger cracks and holes
- Drywall rot
Types of drywall
Knowing what type of drywall your home has can be a key to proper repair and paint.
1) Regular drywall or white board
- The most common type of drywall used for homes
- Made of gypsum
- Suitable for bedrooms, living rooms, hallways, and even some basements
- Not ideal for kitchens, bathrooms, laundry rooms, and other areas prone to moisture and humidity
2) Mold-resistant drywall or green board
- More resistant to water and moisture than the other types of drywall
- It comes with a paper backing thicker than regular drywall
- Coated with wax to repel moisture
- It comes with a fiberglass mesh, which is non-organic, taking away the food source necessary for mold and mildew to grow and spread
- Best for bathrooms, kitchens, laundry rooms, other utility areas, and basements
- Also used as a tile backer
3) Plasterboard or blue board
- The base for plaster applications, much similar to lath in lath-and-plaster walls
- Requires a thin coat or coats of plaster on top of the surface
- Its surface paper is highly absorbent, allowing the plaster coat to stick to the drywall better
- Typically used in older homes to achieve the look of the old-fashioned lath-and-plaster walls
4) Fire-resistant drywall
- It contains fiberglass, which slows down the fire
- It doesn’t burn as fast as regular drywall
- Best for areas with equipment, chemicals, or other items that could cause or catch a fire
- The “X” type offers up to one hour of protection from the flames
- The “C” type is typically used for ceilings to prevent collapse during a fire
5) Sound-proof drywall
- Usually much denser than other types of drywall
- Made from a combination of different materials, such as gypsum, polymers, and wood fibers, to increase the sound transmission class (STC)
- Best installed in areas where noise is a problem or where silence is required
Requirements for painting drywall
 Requirements for painting drywall
- The right tools – Use only quality tools, especially paint brushes, rollers, and roller covers.
- The right type of paint – The best is premium acrylic latex paint.
- Adequate lighting – In the absence of daylight, use a powerful light source.
- The right temperature – It should be above 60 degrees Fahrenheit.
Tools and materials
It pays to have quality tools and materials to help restore your home to its original appearance and beauty. Below is a list of materials needed for patching and painting drywall:
Tools:
- Hand sander or drill with a sanding attachment
- Fine-grit sanding paper (150- to 220-grit)
- Double-strap dust mask
- Goggles
- Paintbrush
- Caulk gun
- Wall anchors
- Drill
- Hammer or mallet
- Screwdriver
Materials:
- Joint compound
- Caulk
- Latex primer, acrylic latex primer, or PVA primer
- Latex paint or acrylic latex paint
Tips and tricks in patching drywall
 Tips and tricks in patching drywall
1) Tips to cover all surfaces before doing essential work
- Move the furniture outside the work area. When moving them out is impossible, move them to the center of your room or cover them to keep dust and paint off.
- Carefully cover the floor with damage using drop cloths to protect it from dust and paint.
- Remove all the switch plates (if they’re located on or near the drywall to be patched and painted) and cover the outlets with painter’s tape.
- Begin coverage from the ground up, adding more layers of protection on the wooden floor to keep them from dust and tool damage.
- Place additional plastic sheeting for easy cleanup during the work process.
- Continue covering furniture and all other surfaces.
- Add plastic sheeting to catch dust and debris.
2) Tips to get rid of water damage from drywall
Visible stains, a sagging surface, mold, and mildew spots can indicate underlying water damage in your drywall.
Since drywall is very porous, prolonged exposure to moisture can result in loss of structural integrity or other issues.
Here’s how to get rid of moisture from your drywall before doing other necessary work:
- Remove wet or damaged drywall insulation foam.
- Allow the interior structure to dry completely before doing other essential work.
 3) Tips to tighten loose drywall
Loose drywall is usually caused by the screws or conical anchors attached to it. They may have rusted over time or moved the drywall. The problem results in a bigger hole that may no longer sufficiently hold the screw, which causes the drywall to become loose.
Follow the instructions below to secure loose drywall:
- Place your drywall above the studs.
- Drill a hole that’s smaller than the anchor.
- Tap the anchor with a hammer or mallet.
- Insert the anchor.
- Use a screwdriver to secure it into the drywall and the stud underneath it.
It’s best to purchase new screws or anchors to replace the old ones.
4) Tips to sand patched drywall
It’s necessary to sand the patched areas of your drywall to achieve a smooth and seamless surface.
- Wear goggles and a double-strap mask (rated for nuisance dust) to protect yourself from sanding dust.
- For smaller patched areas, you will need a hand sander, 150-grit precut sheets of sandpaper to fit the hand sander and a sanding sponge for sanding corners. You may also need a pole sander for sanding hard-to-reach areas.
- For sanding bigger patched areas, you will need a power sander to save you time and effort and give the surface a nice and smooth finish. Since this tool is powerful, use 150-grit sandpaper to prevent you from sanding the surface too much or causing damage to it. Finish your sanding with even finer sandpaper – about 180-grit to 220-grit – to get the best results.
 5) Tips to prime over glossy surfaces
Preparing an existing glossy surface for paint (or other material) is necessary for better patches and texture bonding.
- Make sure that the surface is clean and dry, free from anything that could prevent the topcoat or any material from adhering correctly.
- Any primer will do, but a “super-grip” primer is highly recommended for applying over glossy surfaces. It eliminates the need to sand the surface first before priming.
- Apply one coat of the super-grip primer.
- Allow the primer to dry completely.
6) Tips to apply a thin layer or compound
“Skim coating” is a common home improvement technique that involves smoothing over worn or damaged drywall with a thin layer of joint compound to improve the look of the surface.
Add only a thin enough layer of the joint compound and allow it to dry between applications. If the compound is too thick, add some water to dilute it.
- Prepare your work area. Lay down drop cloths on all nearby walking surfaces and tape off areas (such as baseboards and trim) to protect them from drips or overspray.
- Use a mixing attachment for your power drill to save time and effort mixing your compound to achieve the thin, yogurt-like consistency.
- In the absence of daytime light, place a powerful light source at an angle to the surface where you will apply the compound or spackle.
- You can apply the joint compound with either a roller or a sprayer. But many attest that the roller is the absolute best way to skim coat, especially for a beginner. Roll no more than 1/8” of the joint compound to the surface. Press the roller hard into the wall to force out the air bubbles. Make one small application at a time so that you can smooth it out before it has the chance to dry. Pro tip: Don’t worry if you see a minor cracking on your first coat. Mix the next coat a little thicker by adding some fresh mud.
- Use a skimming blade, trowel, taping knife, or any edged tool to smooth out the applied area.
Adding thin layers of the joint compound, each application wider and thinner than the last, will help you spread the patched area to existing surfaces for a seamless transition while minimizing dust.
Dust control
 Dust control
Dust throughout the home is every customer’s nightmare and every painter’s headache.
As you sand the drywall, it’s necessary to contain the sanding dust. Here are the following ways to keep dust at a minimum:
- Wear goggles and a dust mask to protect yourself.
- Add seal at entry points to contain dust.
- Unscrew electrical plate covers and protect switches and other items.
- Lightly sand the new texture to achieve a smooth and even finish.
Apply a drywall primer.
A general latex primer is fine for drywall. It dries quickly but doesn’t chip, crack, or peel. Latex primers usually have low VOCs, but some variants have zero VOCs. After priming, paint the surface with latex or acrylic paint.
A PVA primer or emulsion primer is best for new and bare drywall. You can use latex and oil-based (alkyd) paints since they dry quickly and easily clean up with water.
 Apply one coat of latex or PVA primer to seal the surface and help the topcoat stick to the surface more uniformly and evenly. A primer also exposes certain areas that need additional attention before applying the final paint coat. It also enhances the topcoat’s color and sheen.
Replace baseboards or trim and caulk joints.
There are various types of baseboards in the market, and each of them has pros and cons.
Common baseboard materials include wood, medium-density fiberboard (MDF), polyvinyl chloride (PVC), or simple vinyl.
- Wood – the most popular baseboard type, but it can be a bit too expensive, especially for high-end wood options.
- MDF – The least expensive baseboard trim option. It can be molded into different shapes but does not hold up well to marks, dents, etc.
- PVC or vinyl – It can hold up well to water damage, but when damaged by contact, it is almost impossible to be repaired and thus requires replacement.
Here are the tips to replace baseboard trim and caulk joints:
- Install any baseboard or trim area.
- Caulk joints and tops of baseboards with paintable caulk where they meet the wall. It creates a nice finish that can significantly impact your space.
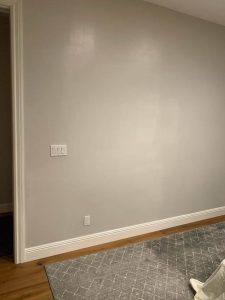
Paint over the patched area.
 Paint over the patched area
Cover the surface with thin coats of paint, in wider coats, to cover the areas beyond the patched area. These thinner and wider coats will achieve a seamless finish.
Clean up after the work is complete.
- Clean up immediately after painting.
- Gently strip off any painter’s tape before the paint can dry.
- Keep a clean and damp cloth nearby to wipe up any wet paint drips and splatters.
- Fold the edges of drop cloths or plastic sheets toward the middle to prevent small spills or drips on nearby surfaces.
- Let the paint dry completely before putting back furniture and wall decor.
- When using latex paints, clean the brushes, rollers, and paint trays with running water.
Conclusion
 Conclusion
This article will provide all the information you need for drywall patching and painting. Follow all the steps and tricks to make your drywall look patched and painted by a professional.
Are you planning your next interior or exterior house painting project? Contact Custom Painting, Inc. at 925-866-9610 or complete our request form to schedule an appointment with our estimator. We always provide estimates free of charge. We serve the Bay area including Danville, Alamo, Blackhawk, Diablo, Livermore, Pleasanton, and San Ramon.
