
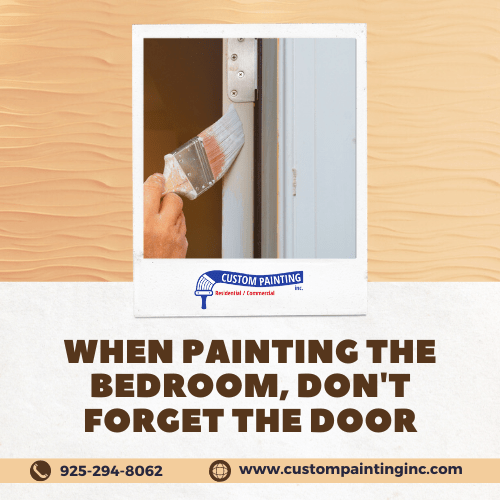
When painting a bedroom, most people focus on walls, ceilings, and trim, often overlooking one crucial element: the door. The door is a significant part of the room’s visual and functional design, and giving it the attention it deserves can enhance the overall look and feel of your space. Let us find out why painting the door matters, how to choose the right color, and tips for achieving a professional finish. Don’t let your door be an afterthought—make it a focal point of your bedroom’s decor.
Why Painting the Door Matters
Painting the bedroom door is an often-overlooked step in home decor, yet it holds significant importance. Addressing the door in your painting project can offer numerous benefits, both aesthetically and practically. Here’s why painting the door matters.
Aesthetic Benefits of a Cohesive Color Scheme
Incorporating the door into your bedroom’s color scheme brings a sense of harmony and unity to the space. When the door color matches or complements the walls, trim, and other elements in the room, it creates a seamless look. This cohesion can make the room feel more put-together and professionally designed. A door that fits well into the overall color palette can enhance the visual appeal, making your bedroom more attractive and inviting.
The Impact of a Well-Painted Door on the Room’s Ambiance
The door is often the first thing you see when entering a bedroom, and its appearance can set the tone for the entire space. A well-painted door can significantly influence the room’s ambiance. For instance, a door painted in a bold color can add a striking focal point and a touch of personality, while a door in a soft, neutral shade can contribute to a calm and relaxing atmosphere. The right door color can make the room feel brighter, larger, and more welcoming, enhancing the overall mood of the space.
Practical Reasons for Painting the Door
Beyond aesthetics, painting the door has several practical benefits. Doors endure a lot of wear and tear, accumulating scuffs, scratches, and other signs of use over time. A fresh coat of paint can cover these imperfections, making the door look new again. This not only improves the door’s appearance but also extends its lifespan. Additionally, painting the door can provide a layer of protection against further damage, helping to preserve its condition. Regularly updating the door’s paint can save you from the cost and hassle of replacing it, maintaining the room’s overall quality and appeal.
Painting the bedroom door is a simple yet effective way to enhance your space both visually and practically. By paying attention to this often-neglected element, you can create a more cohesive, pleasant, and durable environment in your home.
Preparing the Door for Painting
Before you start painting your bedroom door, proper preparation is essential to achieve a smooth, professional finish. Here’s a step-by-step guide to ensure your door is ready for painting.
- Remove the Door: Use a screwdriver or a drill to remove the screws from the hinges. Carefully lift the door off the hinges and place it on a pair of sawhorses or a flat, stable surface. Take off any doorknobs, locks, or other hardware. This makes it easier to paint and ensures you don’t accidentally get paint on these items.
- Clean the Door: Wipe down the door with a damp cloth to remove dust and dirt. For stubborn grime, use a mild detergent mixed with water. After cleaning, rinse the door with clean water and dry it thoroughly with a clean cloth. Ensuring the door is completely dry is crucial to avoid paint adherence issues.
- Sand the Door: Use fine-grit sandpaper (180-220 grit) to sand the door’s surface. This step removes any old paint, rough spots, and imperfections, creating a smooth base for the new paint. After sanding, wipe the door with a tack cloth or a damp cloth to remove any sanding dust. Dust can interfere with paint adhesion and lead to a rough finish.
- Repair Imperfections: Inspect the door for any holes, cracks, or dents. Use wood filler or putty to fill these imperfections. Apply with a putty knife and smooth it out, ensuring it is level with the surface. Once the filler is dry, lightly sand the repaired areas to ensure they are smooth and blend seamlessly with the rest of the door.
- Prime the Door: Select a primer suitable for the door’s material (wood, metal, or composite). Priming is essential as it ensures better paint adhesion and a more even finish. Using a brush or roller, apply a thin, even coat of primer. Let it dry completely according to the manufacturer’s instructions. If necessary, apply a second coat for better coverage.
By following these preparation steps, you’ll ensure that your door is clean, smooth, and ready to take on a fresh coat of paint. Proper preparation not only makes the painting process easier but also helps achieve a more durable and professional-looking result.
Choosing the Right Paint

Selecting the right paint for your bedroom door is crucial for achieving a durable and aesthetically pleasing finish. Here’s what you need to know about the types of paint suitable for doors, recommended brands and finishes, and tips for choosing the right color and finish to complement your bedroom.
Types of Paint Suitable for Doors
- Latex Paint: Latex (or water-based) paint is popular for interior doors due to its quick drying time, easy cleanup, and low odor. It’s also more flexible and less likely to crack over time.
- Oil-Based Paint: Although it takes longer to dry and requires mineral spirits for cleanup, oil-based paint is extremely durable and provides a smooth, hard finish. It’s ideal for high-traffic areas or older doors with a lot of wear and tear.
- Acrylic Paint: Acrylic paint offers a durable finish similar to oil-based paint but with the easy cleanup and low odor of latex paint. It’s a great all-around choice for interior doors.
Recommended Brands
- Benjamin Moore: Known for its high-quality paints, Benjamin Moore offers durable finishes and a wide range of colors.
- Sherwin-Williams: Another trusted brand, Sherwin-Williams provides excellent coverage and durability.
- Behr: Behr paints are widely available and offer a good balance of quality and affordability.
Finishes
- Satin: Satin finishes provide a subtle sheen that is easy to clean, making it ideal for doors. It’s durable enough for frequent use but not too shiny.
- Semi-Gloss: Semi-gloss finishes are more reflective and provide a harder, more durable surface. They are excellent for high-traffic areas and add a bit of shine to the door.
- Gloss: Gloss finishes are highly reflective and very durable. They can make a bold statement but can also highlight imperfections, so proper surface preparation is crucial.
Tips for Selecting the Right Color and Finish to Match the Bedroom
- Consider the Overall Color Scheme: Choose a door color that complements your bedroom’s existing color scheme. You can match the door to the trim or walls for a cohesive look or select a contrasting color for a striking focal point.
- Test Samples: Before committing to a color, test a few samples on the door to see how they look in different lighting conditions. This helps you avoid surprises and ensures you’re happy with the final result.
- Think About the Finish: The finish you choose will affect both the look and durability of the door. Satin and semi-gloss finishes are generally the best choices for interior doors due to their balance of aesthetics and durability.
- Match the Style: Consider the style of your bedroom and home. A modern bedroom might benefit from a sleek, glossy door, while a traditional space might look better with a classic satin finish in a neutral color.
By carefully selecting the right type of paint, brand, and finish, as well as considering the color scheme and style of your bedroom, you can ensure that your painted door enhances the overall look and feel of your space.
Painting the Door
Painting a door can seem like a straightforward task, but achieving a smooth, professional finish requires attention to detail and the right techniques. Here’s a step-by-step guide to painting your door, along with tips to avoid common pitfalls and ensure a beautiful result.
Step-by-Step Guide to Painting the Door
- Preparation: Ensure the door is clean, sanded, and primed, as described in the preparation section.
- Choose Your Tools: Use a high-quality brush or a foam roller designed for smooth surfaces. A combination of both can work well—use the roller for large, flat areas and the brush for edges and detailed work.
- Stir the Paint: Thoroughly stir your paint to ensure an even color and consistency.
- Apply the First Coat:
- Flat Areas: Use the roller to apply a thin, even coat of paint to the door’s larger, flat surfaces.
- Edges and Panels: Use a brush to paint the edges and any recessed panels or detailed areas.
- Let It Dry: Allow the first coat to dry completely according to the paint manufacturer’s instructions.
Techniques for Avoiding Brush Marks and Drips
- Use Thin Coats: Apply thin coats of paint rather than trying to cover in one thick layer. This helps prevent drips and brush marks.
- Maintain a Wet Edge: Work quickly enough to keep a wet edge, blending each stroke into the previous one to avoid visible lines.
- Brush Technique: For brushing, use long, smooth strokes and lightly go over the painted area with the tip of the brush to level out the paint.
- Roller Technique: For rolling, apply the paint in a “W” or “M” pattern and then fill in the gaps with straight passes. This ensures even coverage and minimizes roller marks.
Importance of Multiple Coats and Drying Time
- Multiple Coats: Apply at least two coats of paint. The first coat may look uneven or thin, but additional coats of paint will build up the color and coverage for a more professional finish.
- Drying Time: Allow adequate drying time between coats. Rushing the process can lead to smudges and an uneven finish. Follow the paint manufacturer’s recommended drying times to ensure each layer sets properly.
Tips for Painting Door Edges and Panels
- Edges: Start by painting the door edges first. Use a brush for more control, and apply the paint evenly to avoid drips.
- Panels: If your door has recessed panels, paint these next. Use a brush to reach into the corners and edges, then use a roller or brush to paint the flat surfaces of the panels.
- Order of Painting: Paint the recessed or detailed areas first, then move to the larger flat surfaces. This method helps prevent overloading the brush or roller with paint and reduces the risk of drips and runs.
- Inspect for Drips: Frequently check for drips and runs, especially on vertical surfaces. Use a brush to gently smooth out any imperfections as you notice them.
By following these steps and techniques, you can achieve a smooth, professional-looking paint job on your bedroom door. Patience and careful attention to detail will ensure a beautiful, durable finish that enhances the overall look of your space.
Reinstallation and Final Touches

After painting your door, the final steps are crucial to ensure a polished and professional finish. Here’s how to safely reinstall the door, inspect the paint job for touch-ups, and add new hardware if you want to give your door an updated look.
How to Safely Reinstall the Door
- Check for Dryness: Ensure the paint is completely dry before handling the door to avoid smudging or damaging the fresh paint. It’s best to let the door dry for at least 24 hours or according to the paint manufacturer’s instructions.
- Reattach Hardware: If you removed the door hardware, reattach it before reinstalling the door. This includes doorknobs, locks, and any other fittings. Make sure everything is securely fastened.
- Position the Door: With a helper, position the door back into the doorframe, aligning the hinges with their respective slots on the door and the frame.
- Insert the Hinges: Insert the hinge pins back into the hinges. Start with the top hinge to hold the door in place, then move to the bottom hinge, and finally secure the middle hinge if applicable.
- Test the Door: Open and close the door a few times to ensure it swings smoothly and that the hardware functions correctly. Make any necessary adjustments to the hinges or hardware to ensure proper alignment and operation.
Inspecting the Paint Job for Touch-Ups
- Close Inspection: Carefully inspect the entire door for any missed spots, drips, or uneven areas. Pay particular attention to the edges, corners, and any recessed panels.
- Light Sanding: If you find any rough spots or drips, lightly sand these areas with fine-grit sandpaper (220 grit) to smooth them out before touching them up.
- Touch-Up: Use a small brush to touch up any imperfections. Apply the paint lightly and blend it into the surrounding areas to avoid noticeable patches.
- Final Drying: Allow the touch-up areas to dry completely before using the door regularly to prevent any smudging or damage.
Adding New Hardware for an Updated Look (Optional)
- Choose New Hardware: Select new hardware that complements the style of your room and the color of your door. Consider the finish (e.g., brushed nickel, brass, matte black) and design (modern, traditional, etc.) to match your decor.
- Remove Old Hardware: If you haven’t already, remove the old hardware. Use a screwdriver to unscrew and remove doorknobs, locks, and any other fittings.
- Install New Hardware: Follow the manufacturer’s instructions to install the new hardware. Typically, this involves aligning the new hardware with the existing holes and securing it with screws.
- Final Adjustments: Ensure that the new hardware is securely attached and that the door opens, closes, and locks smoothly. Make any necessary adjustments to achieve the best fit and operation.
By carefully reinstalling the door, inspecting the paint job for touch-ups, and optionally adding new hardware, you can complete your door painting project with a polished and professional finish. These final touches not only enhance the look of your door but also ensure it functions perfectly, adding to the overall appeal and value of your bedroom.
Conclusion
Painting your bedroom door can significantly enhance the overall look and feel of your space. By following these steps—from preparation to reinstallation—you can achieve a professional finish that adds style and durability. For expert assistance or more information, contact Custom Painting, Inc. at 925-866-9610 or complete our contact form. We’re here to help with all your painting needs!
