

A well-maintained fence can boost the curb appeal of your home and increase its value. One of the ways to maintain a fence is through painting or staining. We’ll explore in this article the benefits of keeping your fence in top condition. We’ll also include expert advice when it comes to picking the right finishes and application techniques that will keep your fence protected and aesthetically pleasing. Read on and learn how to transform your fence into a standout feature for your home.
Choosing the Right Materials
The appearance and longevity of a fence can be affected by the materials you choose. Here are some tips on how to select the best options for your needs:
Paint vs. Stain
Paint and stain has its own pros and cons. Understanding these can help you choose the best one for your fence.
- Paint: Paint provides a thick, opaque coat that covers imperfections. It comes in a variety of colors and forms a protective layer that can prevent moisture from penetrating the wood. But keep in mind that it can chip and crack over time and needs more maintenance. It also tends to trap moisture in the wood, which can lead to rot if the paint layer is damaged.
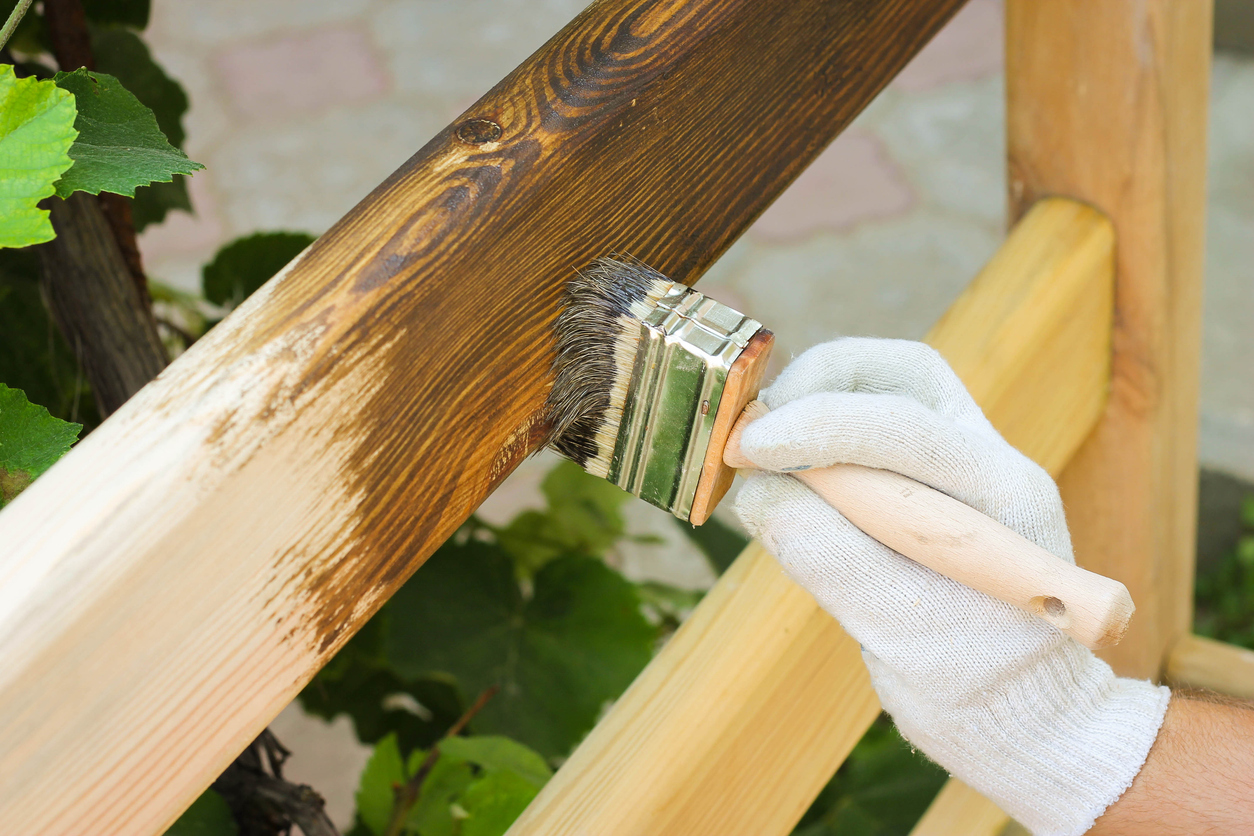
- Stain: Stain penetrates the wood and enhances its natural beauty. It also offers a more rustic look. It requires less maintenance than paint, and reapplications are more straightforward. However, note that stain offers less UV protection than paint and will fade over time. It needs reapplication to maintain its protective qualities.
It is important to consider the type of wood, the climate, and the desired appearance when choosing between paint and stain. Paint is ideal for regions with high moisture, providing more barrier protection. Stain is better for areas with moderate climates and for those who prefer to showcase the natural grain of the wood.
Types of Paint and Stain
Understanding the different types of paint and stain can help you achieve the desired finish and durability:
Paint
- Oil-Based: Known for its durability and rich finish. It dries slower, allowing for a smoother finish.
- Water-Based: These paints are easier to clean up and faster to dry. It’s less odorous and toxic than oil-based paints and retains color better.
Stain
- Oil-Based Stain: It penetrates deep into the wood and provides better protection. It also lasts longer but requires more drying time.
- Water-Based Stain: This type of stain is easier to clean and dries fast. It is also less odorous and environmentally friendlier. But it may not last as long as oil-based stains.
- Hybrid Products: This combines the advantages of oil and water-based products. It offers durability with easier application and cleanup.
Look for products offering UV protection to prevent fading, as well as mold and mildew resistance to enhance the longevity and appearance of the fence in damp climates.
Tools and Equipment
Choosing the right tools can enhance the application process and final look. Here are the tools needed:
- Brushes: These are ideal for detailed work and smaller areas. Natural bristles are best for oil-based finishes, while synthetic bristles work well with water-based products.
- Rollers: Rollers are great for quickly covering large and flat areas. Use rollers with a thicker nap for rough surfaces.
- Sprayers: These can provide the fastest and most uniform application. They are great for large and intricate fence areas.
- Safety Gear: Always use gloves, goggles, and masks, especially when spraying finishes or using products with strong fumes.
Invest in high-quality brushes and rollers to ensure a smooth application and finish. Higher-quality tools not only work better but also last longer, making them worthwhile investments for frequent maintenance tasks.
By understanding and carefully selecting the right materials and tools, you can ensure that your fence not only looks beautiful but also stands up to the elements and enhances your property for years to come.
Preparing the Fence
Proper preparation is essential to make sure that the fence will look great and the finish will last long. Below are some tips on how to prepare the fence for stain or paint application:
1. Cleaning and Repairing
Cleaning the fence thoroughly before painting or staining is important for the adhesion of the finish and the overall look of your project.
- Remove Debris: Start by removing any loose debris with a brush or blower.
- Washing: Use a power washer or a garden hose with a spray attachment to thoroughly wash the fence. For wooden fences, a mixture of water and a mild detergent or a specially formulated fence cleaner works well to remove dirt and mildew.
- Chemical Cleaners: For tougher stains, consider using a wood cleaner or a solution of bleach and water (1 part bleach to 2 parts water), but ensure to rinse thoroughly after application to prevent damage to the wood.
Repairing common issues is essential to prevent further damage and to ensure a smooth finish:
- Loose Boards and Screws: Tighten any loose screws and secure loose boards. Replace any damaged or missing screws with new ones.
- Rot: Inspect the fence for signs of rot, especially at the base and around nails or screws. Remove rotted sections and replace them with fresh wood. Use a wood hardener on affected areas to strengthen the remaining wood before filling in minor rotted spots with wood filler.
2. Sanding and Priming
Sanding is an important step for wooden fences as it smooths out rough spots and opens up the pores of the wood for better stain or paint adhesion.
- When to Sand: Sand the fence after cleaning and repairing but before applying primer. For previously painted fences, sanding is essential to remove peeling paint and smooth out the surface.
- How to Sand: Use a medium-grit sandpaper or a sanding block for manual sanding or an orbital sander for larger areas. Always sand in the direction of the wood grain to avoid scratches.
Priming prepares the wood and ensures a uniform look while enhancing the adhesion and longevity of the topcoat.
- Benefits of Priming: Primer seals the wood, blocks stains, and provides a stable surface that will help the topcoat adhere better and last longer. It also helps to achieve true color with fewer coats of paint.
- Recommended Products: For most wood fences, a high-quality exterior primer designed for wood is ideal. Choose an oil-based primer for areas with high moisture exposure and a water-based primer for easier cleanup and faster drying times.
By carefully preparing your fence through cleaning, repairing, sanding, and priming, you can ensure a flawless finish that enhances its appearance and protects it against the elements and wear over time.
Applying Paint or Stain
Once your fence is cleaned, repaired, sanded, and primed, it’s time to apply the paint or stain. This stage is crucial as it determines the aesthetic appeal and the protective qualities of your fence finish. Here’s how to ensure a smooth application:
1. Choosing the Right Day
Choose a day with mild weather, ideally with temperatures between 50°F and 80°F. Avoid painting on humid days or when rain is expected within 24 hours of application.
2. Application Techniques
Paint:
- Using Brushes: Brushes are great for detailed and smaller areas. Use a high-quality brush to apply a generous but even coat of paint. Ensure that you work the paint into any crevices and corners.
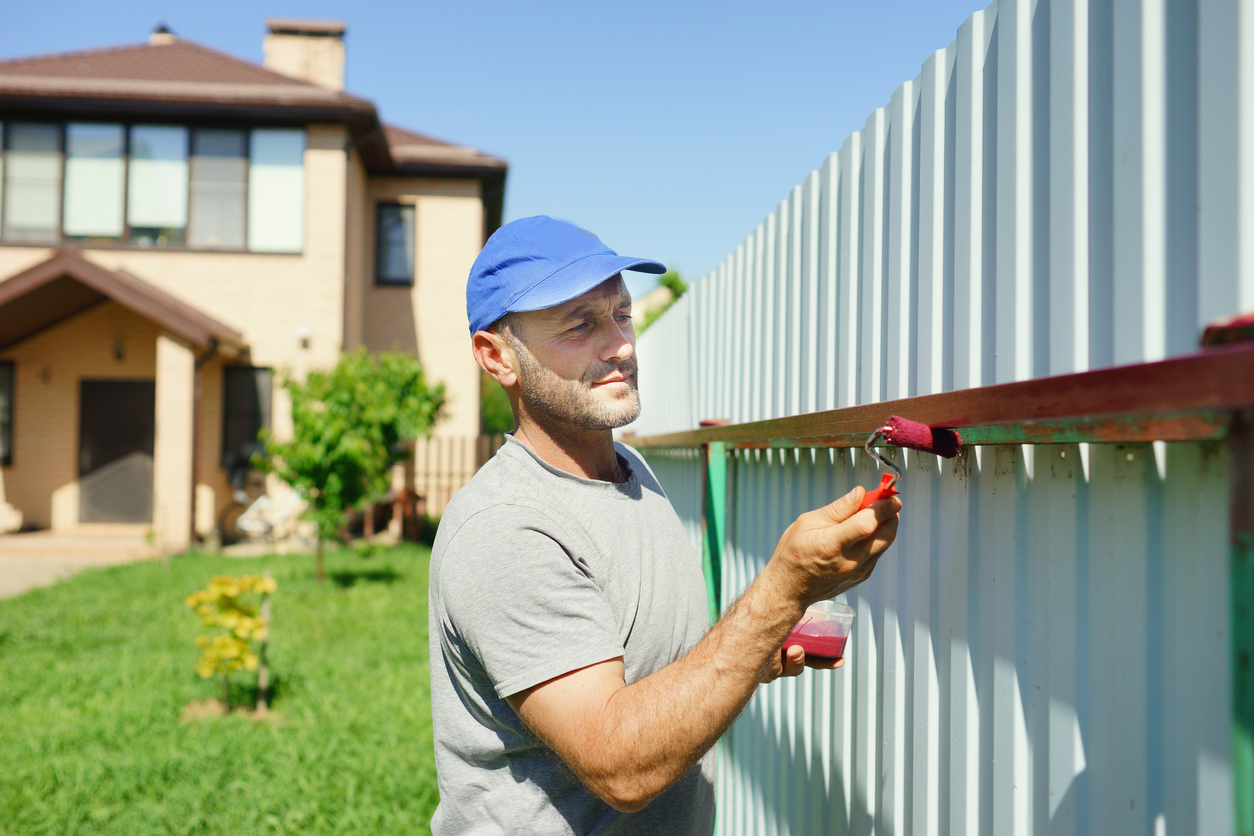
- Using Rollers: A roller can speed up the process for larger flat areas. Use a roller with a medium nap to hold more paint and provide even coverage.
- Using Sprayers: A sprayer can be the fastest way to cover large areas or fences with intricate designs. It provides an even coat quickly but requires some practice to master the technique. Keep the sprayer at a consistent distance from the fence and move in smooth, overlapping strokes.
Stain:
- Using Brushes: Brushes allow for better control of the amount of stain applied, which is crucial since stains are thinner than paints. Apply with the grain of the wood.
- Using Rollers: Rollers work well for applying stain on large, flat fence sections. Ensure the roller is not overly saturated, and apply it with light or even pressure.
- Using Sprayers: Spraying is an efficient way to apply stains, especially on rough or uneven surfaces. Like with paint, maintain a steady hand and even motion to avoid drips and uneven application.
3. Number of Coats
- Paint: Typically, two coats of paint are necessary for complete coverage and to achieve the desired color depth. Allowing the first coat to dry thoroughly before applying the second coat is recommended.
- Stain: The number of coats depends on the type of stain and the desired opacity. Transparent stains need one to two coats, while solid stains require two coats for uniform coverage. Always check the manufacturer’s guidance for drying times between coats.
4. Drying and Curing Time
Allow enough time for the paint or stain to dry between coats. Drying times can vary based on the product, temperature, and humidity levels. When the final coat is applied, give your fence several days to cure fully. Curing time is important for the durability of the finish, especially before exposing the fence to harsh weather.
5. Cleanup and Maintenance
Clean your brushes, rollers, and sprayers with the right solutions: water for water-based products and mineral spirits for oil-based products. Proper cleaning extends the life of your tools. Regularly check your fence for chips, cracks, or signs of wear. Applying maintenance coats every few years can help extend the life of the finish and ensure your fence remains an attractive feature of your property.
By following these steps for applying paint or stain, you can achieve a professional-quality finish that not only looks beautiful but also provides a durable barrier to protect your fence over time.
Achieving Professional-Looking Results
Aiming for a professional finish will enhance the aesthetic of your outdoor space and the longevity of the fence itself. Here are some of our expert tips to help you achieve the best results:
1. Edging and Detail Work
Mastering the art of edging and handling detailed areas is essential for a fence finish that stands out with precision.
- Use Quality Tape: Use high-quality painter’s tape when painting to mask off areas where you want sharp lines. Ensure the tape is firmly adhered to avoid bleed-through.
- Brush Selection: Choose smaller, angled brushes for precision work around edges and in detailed areas like around hardware or intricate patterns in the fence design.
- Technique: Load the brush lightly and use controlled strokes that move away from the tape or edge when applying paint or stain near edges. This prevents buildup along the edges and helps maintain crisp lines.
2. Multiple Coats
Applying multiple coats is often necessary to achieve uniform color and the best protection.
- Timing: Allow the first coat to dry completely before applying the second coat. Refer to the product’s instructions for specific drying times, as these can differ greatly between various formulas and environmental conditions.
- Application: Apply each coat thinly rather than a single thick coat. Thin coats dry more uniformly and adhere better, reducing the chances of drips or sags.
- Sand Between Coats: For paint, lightly sanding between coats with fine-grit sandpaper can smooth out any imperfections and provide a better bond for the next coat. This step is typically unnecessary for stains unless noticeable issues occur after the first coat dries.
3. Drying and Curing
Understanding the drying and curing process is crucial to ensure the durability and appearance of your fence finish.
- Drying Time: Different products have different drying times, which can be affected by temperature and humidity. Always check the manufacturer’s recommendations. A coat of stain might require 24 to 48 hours, while paint may need 1 to 2 hours for touch dry and up to 24 hours for a recoat.
- Curing Time: While paint or stain may feel dry to the touch, full curing can take several days to weeks. During this time, the finish hardens and achieves its full durability.
- What to Avoid: During the drying and especially the curing period, avoid exposing the fence to harsh conditions such as rain, sprinklers, and extreme temperatures. You should also avoid touching or cleaning the fence during this time to prevent marks and damage.
By paying close attention to edging and detail work, properly applying multiple coats, and allowing adequate time for drying and curing, you can achieve a professional-quality finish on your fence that looks fantastic and withstands the test of time.
Troubleshooting Common Issues
Issues can arise when painting or staining a fence, even with careful preparation and application. Here are some tips on how to handle the most common problems:
1. Stains and Drips
Mistakes during painting or staining can lead to drips and stains, but with the right approach, these can be corrected.
- Fixing Drips: If you notice drips during application, quickly smooth them out with a brush or roller. If the drips have dried, sand the area lightly with fine-grit sandpaper until smooth, then reapply the paint or stain.
- Removing Stains: If the stain from overspray or spills has dried on unwanted areas, use a stain remover or sand the area lightly and touch up with the original surface color.
2. Fading and Peeling
Exposure to the elements can cause your fence’s finish to fade and peel over time, but these issues can be prevented and remedied.
Prevention:
- Quality Products: Use high-quality paints or stains designed for exterior use and suited to your specific climate conditions. Products with built-in UV protection are ideal for reducing fading.
- Proper Application: Ensure proper preparation of the surface and application of the product. Adhering to recommended drying and curing times helps enhance the durability of the finish.
- Regular Maintenance: Inspect the fence annually and touch up any areas where the finish is beginning to wear away. This proactive approach prevents larger areas of damage and extends the overall life of the finish.
Remedies:
- Fading: Applying a fresh coat of stain or paint can restore faded color. Ensure the surface is clean and dry before reapplication.
- Peeling: For peeling areas, remove all loose and peeling paint by scraping and sanding. Prime any bare wood areas to ensure good adhesion of the new paint. Apply a fresh coat of paint following the original guidelines for best results.
Understanding how to solve common issues like stains, drips, fading, and peeling can keep your fence looking its best. Regular maintenance, using the right products, and correcting problems as they arise will help ensure your fence remains a durable and attractive boundary for your property.
Conclusion
You can achieve and maintain a flawless finish on your fence with the right preparation, application, and troubleshooting techniques. We hope that the tips we shared in this article will help you ensure your fence remains beautiful and durable for many years. If you need further assistance or professional services, don’t hesitate to contact Custom Painting, Inc. at 925-866-9610 or reach out through our online contact form. We’re here to help you achieve the perfect finish for your fence and home.
