

A primer isn’t necessary for every paint project, but it can make a big difference. It enhances paint adhesion, ensuring a smooth and even finish. It can also help cover stains and darker colors, making your topcoat look its best. Plus, it can increase the durability of your paint job.
Deciding whether to use primer for an entire project or to spot prime depends on several factors. This article explores when each method is appropriate and the benefits of each approach from a professional painter’s perspective.
Understanding a primer and its purpose
What is a primer?
Definition and purpose
A primer is a preparatory or base coat applied on surfaces before painting. Its primary purposes are to ensure better paint adhesion to the surface, increase paint durability, and provide additional protection for the material you paint.
Types of primer and their specific uses:
1. Oil-Based primer:
- Use: It is ideal for wood surfaces, including bare or previously painted wood. It blocks stains, prevents tannin bleed, and provides a solid base for oil-based and latex paints.
- Advantages: It is excellent for stain-blocking, strong adhesion, and durable finish.
2. Latex (water-based) primer:
- Use: It is suitable for drywall, softwoods, bricks, concrete, and galvanized metal. It’s preferred for interior applications and when working in low-odor environments.
- Advantages: It is fast-drying, easy to clean with soap and water, and environmentally friendly.
3. Shellac primer:
- Use: This primer is best for covering heavy stains, smoke damage, and odors. It can be used on various surfaces, including wood, metal, plaster, and plastic.
- Advantages: It has superior stain-blocking properties and excellent adhesion.
Benefits of using a primer
Importance of primer for adhesion, coverage, and durability:
- Adhesion: Primer creates a binding layer that allows the paint to adhere better to the surface, preventing peeling and chipping.
- Coverage: It helps cover imperfections, stains, and previous colors, providing a uniform base for the topcoat. It can reduce the number of paint coats needed.
- Durability: By sealing porous surfaces and providing a robust foundation, primer enhances the paint job’s longevity, making it more resistant to environmental factors.
How a primer helps in achieving a smooth and even finish:
- A primer fills in minor imperfections and creates a smooth, consistent surface that allows the paint to glide evenly.
- It can prevent the underlying material from absorbing too much paint, ensuring a more even color distribution and a professional-looking finish.
Using the appropriate primer is crucial in any painting project to ensure a high-quality, long-lasting result.
When to use a primer for a complete project
New surfaces
Explanation: New drywall, bare wood, and unpainted surfaces are porous and absorbent, leading to uneven paint application. Priming these surfaces seals the pores, providing a smooth, uniform base for paint.
Benefits:
- Seals and prepares: Ensures the surface is sealed, preventing uneven paint absorption.
- Improves adhesion: Creates a better bond between the surface and the paint, enhancing durability.
- Enhances finish: Results in a smoother, more even topcoat, reducing imperfections.
Drastic color changes
Importance: When transitioning from dark to light colors or vice versa, a primer helps cover the old color, preventing it from bleeding through the new paint.
Benefits:
- Uniform color: Ensures the new paint color appears true and even, without traces of the old color.
- Reduces topcoats: Minimizes the required number of topcoats, saving time and paint.
Problematic surfaces
Scenarios: Surfaces that are heavily stained, water-damaged, or previously glossy require complete priming to address and correct these issues.
Importance:
- Stain blocking: Primer helps to cover and seal stains, preventing them from bleeding through the paint.
- Adhesion on glossy surfaces: Primer ensures proper paint adhesion to glossy surfaces, which paint alone might not stick to effectively.
- Surface repair: It helps address minor surface imperfections, providing a better foundation for the topcoat.
When spot priming is appropriate
Spot priming is appropriate in the following scenarios:
Minor repairs and patches
Explanation: Spot priming small areas where repairs have been made helps prepare the surface for a uniform topcoat.
Benefits: It ensures repaired areas blend seamlessly with the existing paint, avoiding noticeable patches.
Touch-ups and maintenance
Scenarios: Minor touch-ups on previously painted surfaces, like small chips or scratches. Benefits: Spot priming saves time and materials by targeting only the needed areas, maintaining the overall integrity of the paint job.
Areas with stains or marks
Importance: Spot priming specific stains or marks prevents them from bleeding through the new paint.
Techniques: Use a stain-blocking primer to seal the area effectively, ensuring stains do not reappear.
Techniques for effective spot priming
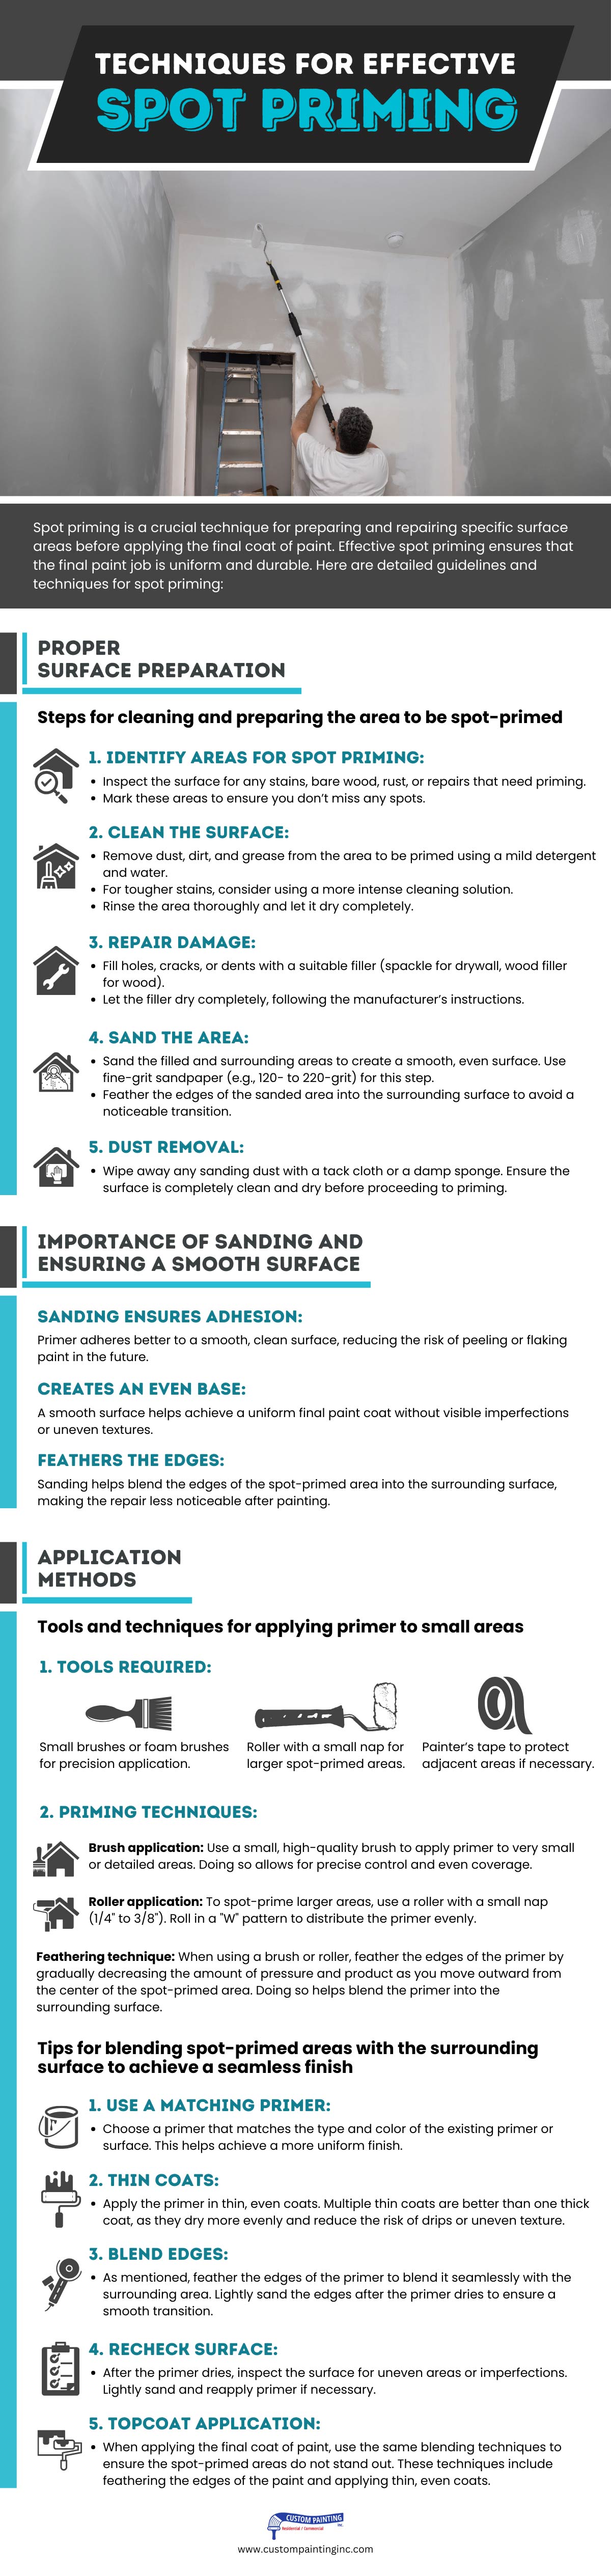
Spot priming is a crucial technique for preparing and repairing specific surface areas before applying the final coat of paint. Effective spot priming ensures that the final paint job is uniform and durable. Here are detailed guidelines and techniques for spot priming:
Proper surface preparation
Steps for cleaning and preparing the area to be spot-primed
1. Identify areas for spot priming:
- Inspect the surface for any stains, bare wood, rust, or repairs that need priming.
- Mark these areas to ensure you don’t miss any spots.
2. Clean the surface:
- Remove dust, dirt, and grease from the area to be primed using a mild detergent and water.
- For tougher stains, consider using a more intense cleaning solution.
- Rinse the area thoroughly and let it dry completely.
3. Repair damage:
- Fill holes, cracks, or dents with a suitable filler (spackle for drywall, wood filler for wood).
- Let the filler dry completely, following the manufacturer’s instructions.
4. Sand the area:
- Sand the filled and surrounding areas to create a smooth, even surface. Use fine-grit sandpaper (e.g., 120- to 220-grit) for this step.
- Feather the edges of the sanded area into the surrounding surface to avoid a noticeable transition.
5. Dust removal:
- Wipe away any sanding dust with a tack cloth or a damp sponge. Ensure the surface is completely clean and dry before proceeding to priming.
Importance of sanding and ensuring a smooth surface
- Sanding ensures adhesion: Primer adheres better to a smooth, clean surface, reducing the risk of peeling or flaking paint in the future.
- Creates an even base: A smooth surface helps achieve a uniform final paint coat without visible imperfections or uneven textures.
- Feathers the edges: Sanding helps blend the edges of the spot-primed area into the surrounding surface, making the repair less noticeable after painting.
Application methods
Tools and techniques for applying primer to small areas
1. Tools required:
- Small brushes or foam brushes for precision application.
- Roller with a small nap for larger spot-primed areas.
- Painter’s tape to protect adjacent areas if necessary.
2. Priming techniques:
- Brush application: Use a small, high-quality brush to apply primer to very small or detailed areas. Doing so allows for precise control and even coverage.
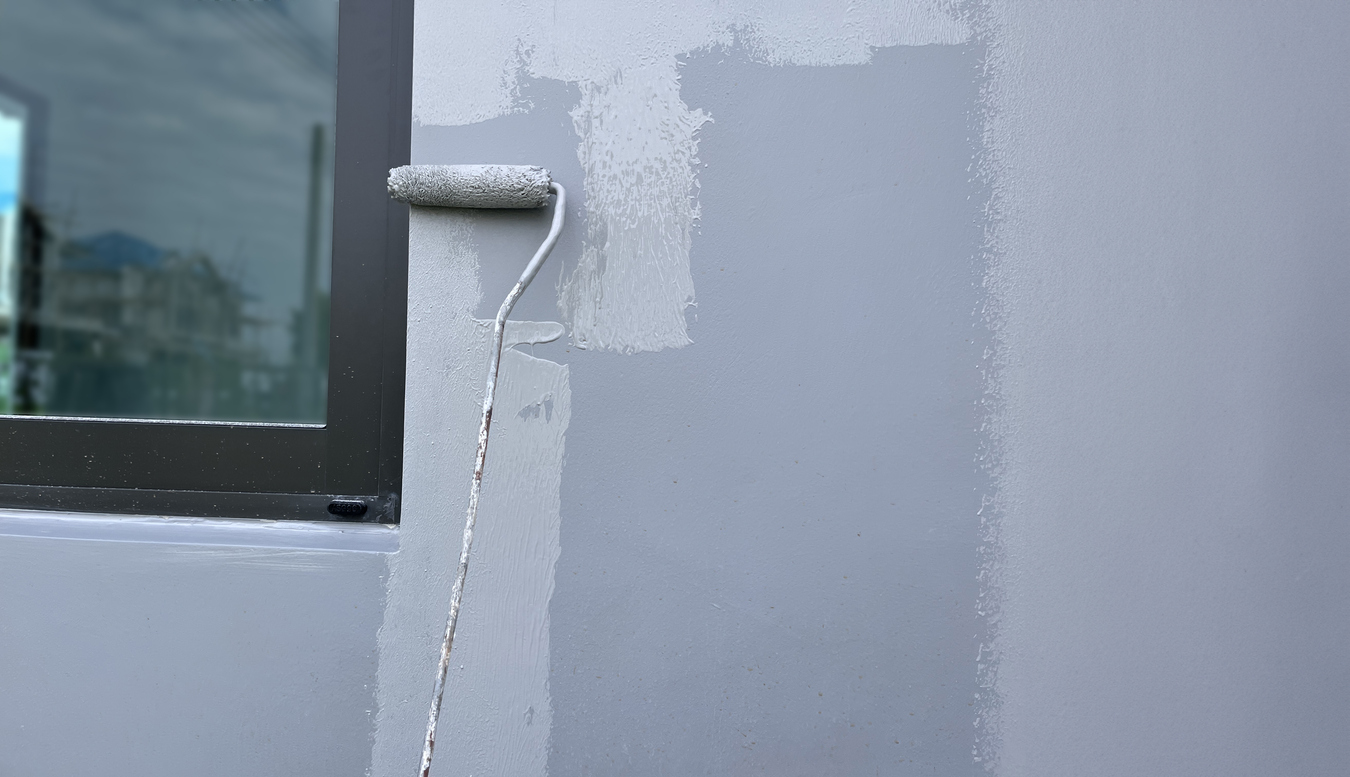
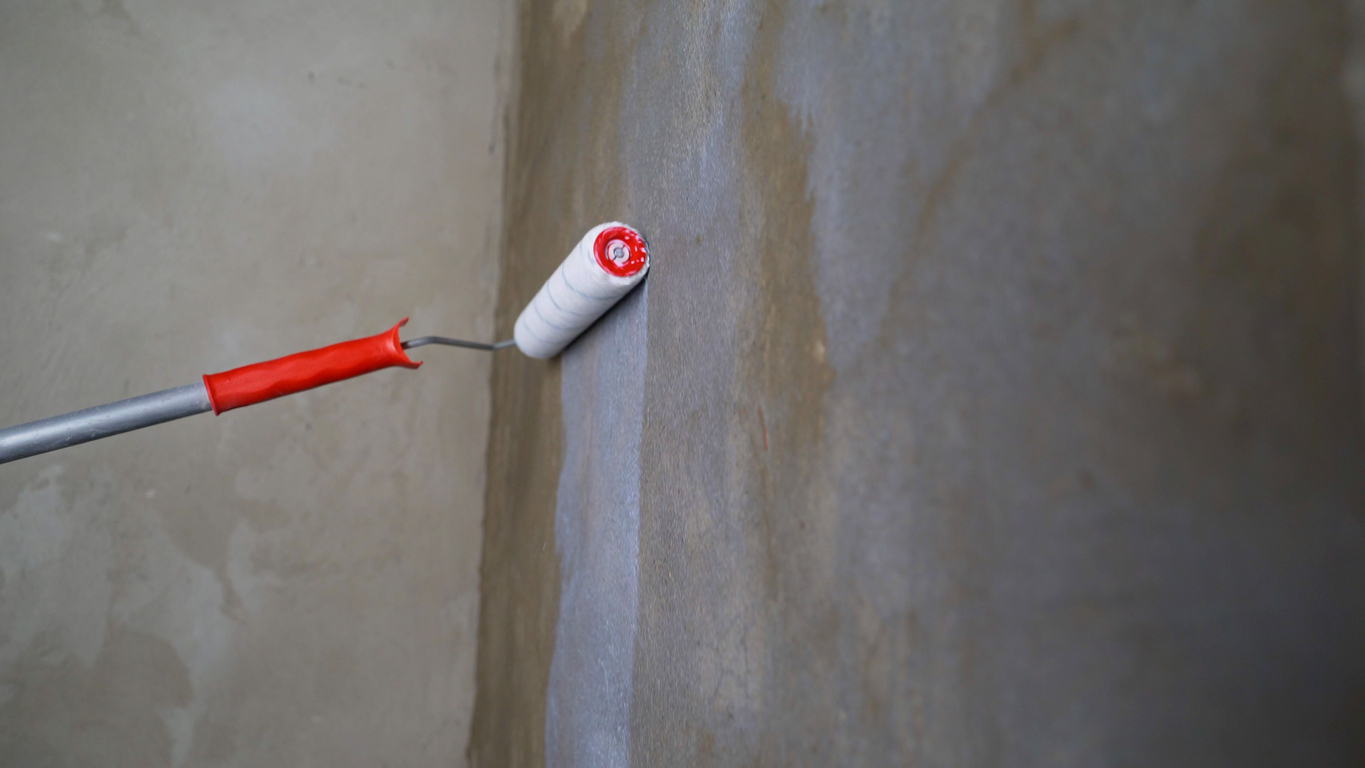
- Roller application: To spot-prime larger areas, use a roller with a small nap (1/4″ to 3/8″). Roll in a “W” pattern to distribute the primer evenly.
- Feathering technique: When using a brush or roller, feather the edges of the primer by gradually decreasing the amount of pressure and product as you move outward from the center of the spot-primed area. Doing so helps blend the primer into the surrounding surface.
Tips for blending spot-primed areas with the surrounding surface to achieve a seamless finish
1. Use a matching primer:
- Choose a primer that matches the type and color of the existing primer or surface. This helps achieve a more uniform finish.
2. Thin coats:
- Apply the primer in thin, even coats. Multiple thin coats are better than one thick coat, as they dry more evenly and reduce the risk of drips or uneven texture.
3. Blend edges:
- As mentioned, feather the edges of the primer to blend it seamlessly with the surrounding area. Lightly sand the edges after the primer dries to ensure a smooth transition.
4. Recheck surface:
- After the primer dries, inspect the surface for uneven areas or imperfections. Lightly sand and reapply primer if necessary.
5. Topcoat application:
- When applying the final coat of paint, use the same blending techniques to ensure the spot-primed areas do not stand out. These techniques include feathering the edges of the paint and applying thin, even coats.
By following these steps and techniques, you can achieve a smooth, professional-looking finish with spot priming, ensuring that your final paint job is seamless and long-lasting.
Pros and cons of each approach
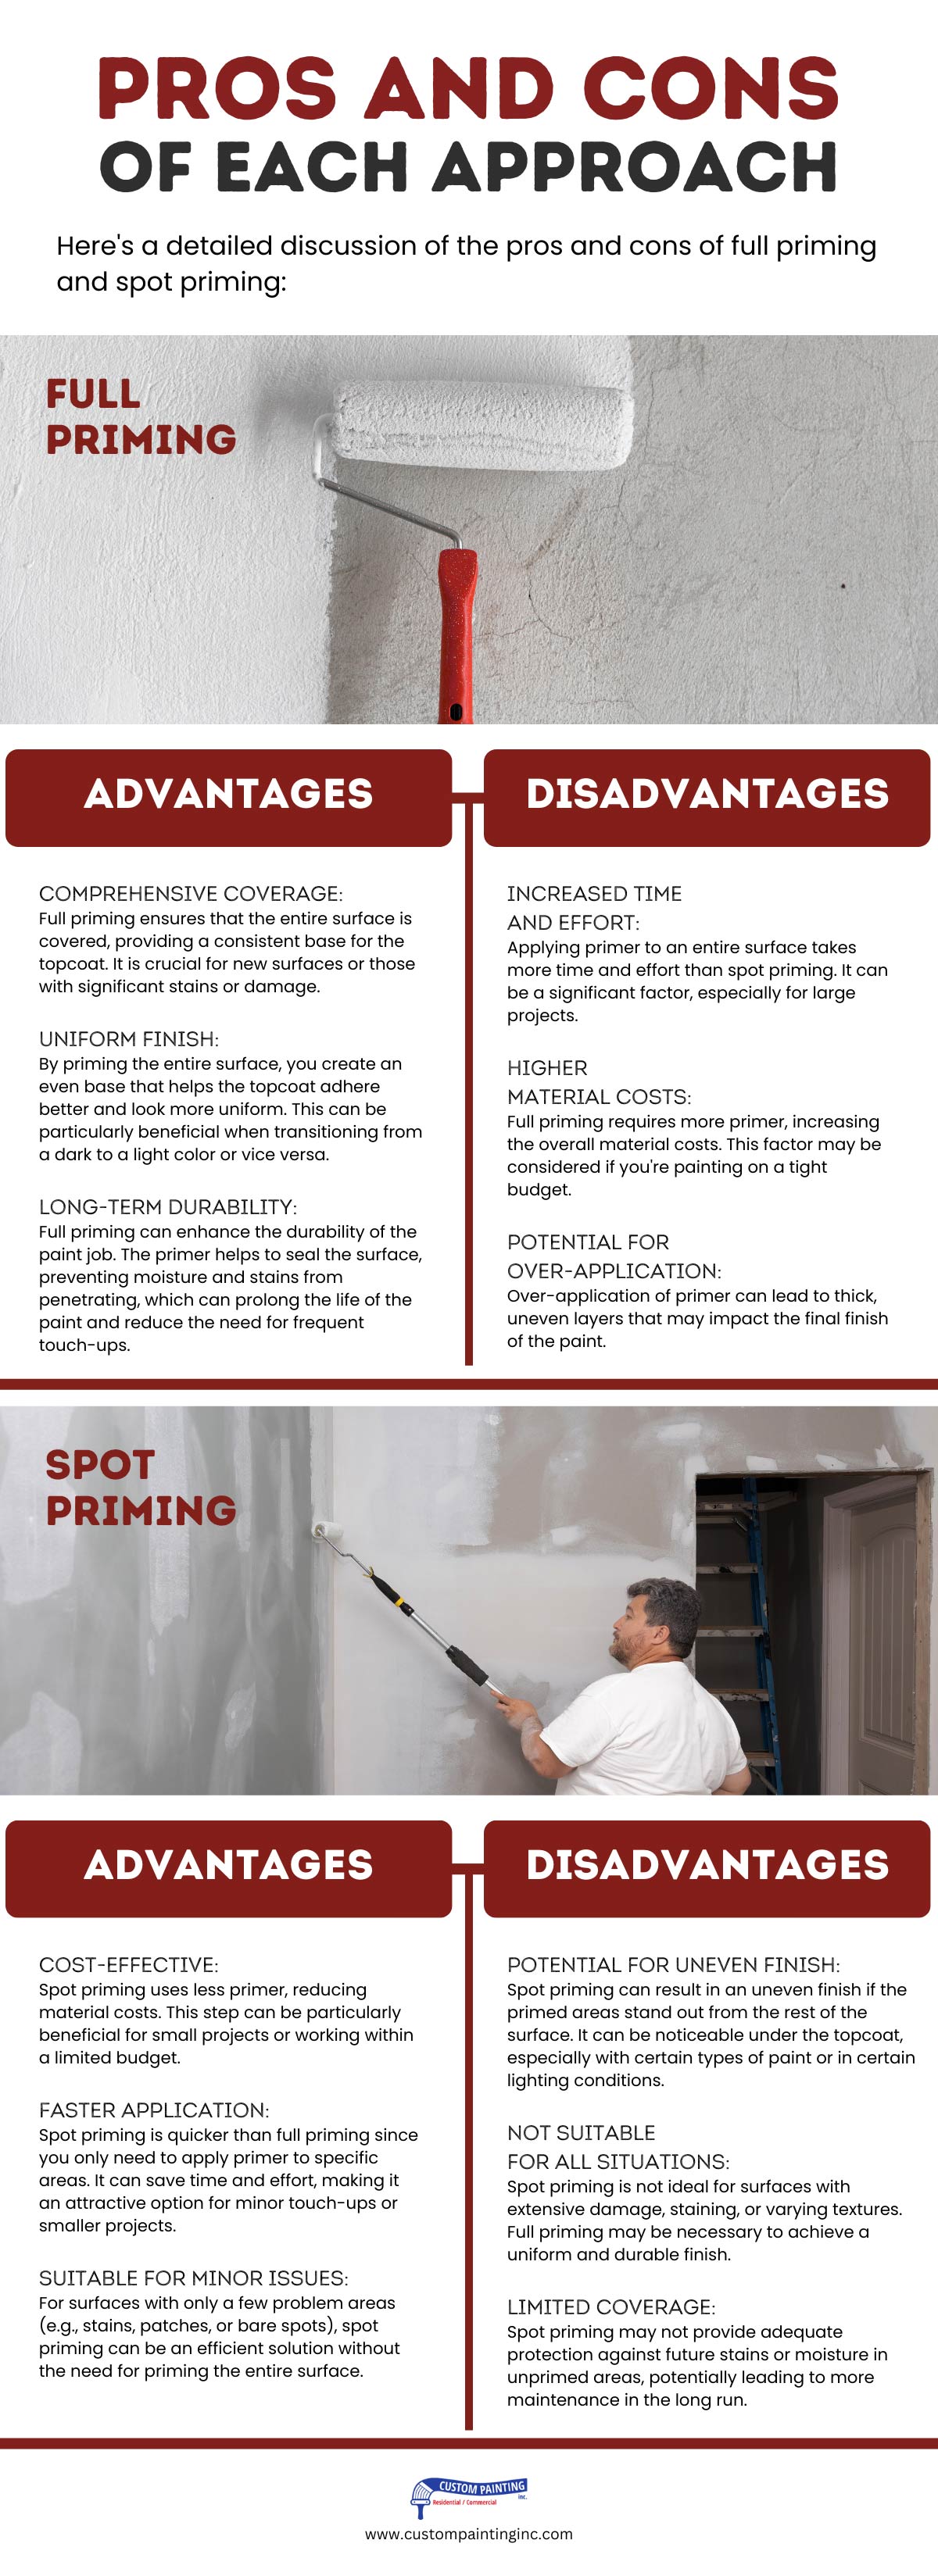
Here’s a detailed discussion of the pros and cons of full priming and spot priming:
Full priming
Advantages:
- Comprehensive coverage: Full priming ensures that the entire surface is covered, providing a consistent base for the topcoat. It is crucial for new surfaces or those with significant stains or damage.
- Uniform finish: By priming the entire surface, you create an even base that helps the topcoat adhere better and look more uniform. This can be particularly beneficial when transitioning from a dark to a light color or vice versa.
- Long-term durability: Full priming can enhance the durability of the paint job. The primer helps to seal the surface, preventing moisture and stains from penetrating, which can prolong the life of the paint and reduce the need for frequent touch-ups.
Disadvantages:
- Increased time and effort: Applying primer to an entire surface takes more time and effort than spot priming. It can be a significant factor, especially for large projects.
- Higher material costs: Full priming requires more primer, increasing the overall material costs. This factor may be considered if you’re painting on a tight budget.
- Potential for over-application: Over-application of primer can lead to thick, uneven layers that may impact the final finish of the paint.
Spot priming
Advantages:
- Cost-effective: Spot priming uses less primer, reducing material costs. This step can be particularly beneficial for small projects or working within a limited budget.
- Faster application: Spot priming is quicker than full priming since you only need to apply primer to specific areas. It can save time and effort, making it an attractive option for minor touch-ups or smaller projects.
- Suitable for minor issues: For surfaces with only a few problem areas (e.g., stains, patches, or bare spots), spot priming can be an efficient solution without the need for priming the entire surface.
Disadvantages:
- Potential for uneven finish: Spot priming can result in an uneven finish if the primed areas stand out from the rest of the surface. It can be noticeable under the topcoat, especially with certain types of paint or in certain lighting conditions.
- Not suitable for all situations: Spot priming is not ideal for surfaces with extensive damage, staining, or varying textures. Full priming may be necessary to achieve a uniform and durable finish.
- Limited coverage: Spot priming may not provide adequate protection against future stains or moisture in unprimed areas, potentially leading to more maintenance in the long run.
Conclusion
The choice between full and spot priming depends on your project’s specifications and requirements. Full priming is the better choice for comprehensive coverage, uniformity, and long-term durability despite the higher time, effort, and cost involved. Spot priming can be an effective solution for minor issues, cost savings, and faster application, though it may come with the risk of an uneven finish and reduced long-term protection.
Anyone looking to transform their home with a fresh coat of paint should pay attention to the details and follow the best practices outlined above. But for those wanting the absolute best results, consulting with Custom Painting, Inc.’s team of paint experts is highly recommended. We deliver high-quality, tailored painting solutions that meet our clients’ unique needs. With our expertise, you can achieve a flawless finish that enhances the beauty and value of your home.
Don’t hesitate to contact us for all your painting needs. Call us at 925-866-9610 or use our contact form for a free, no-obligation job quote. We’re here to help bring your vision to life.
